Sencha ExtJS 5 and sencha touch Tutorial , by Hery Purnama , Sencha ExtJS Freelance Trainer - +62.81.223344.506 , http://freelance-it-trainer.blogspot.com

What Is Sencha ExtJS : Sencha Ext JS is the leading standard for business-grade web application development. With over 100 examples, 1000 APIs, hundreds of components, a full documentation suite and built in themes, Ext JS provides the tools necessary to build robust desktop applications.


Tuesday, April 7, 2015

Tutorial 4 - ExtJS Architecture

Before we start writing code we need to learn and understand a few concepts first.
Ext JS is divided in three layers, as shown in the following screenshot. The purpose
of these layers is to share code with Sencha Touch, a framework to create mobile
web applications:

ExtJS Layer
In the Ext Foundation layer the Ext object is created, as well as some useful
utilities and the class system that allows us to extend classes, override methods and
properties, add mixins and configurations to classes, and many more things.

The Ext Core layer contains the classes that manage the Document Object
Model(DOM), setting and firing events, support for Ajax requests, and classes to
search the DOM using CSS selectors.

Finally the Ext JS 4 layer contains all the components, widgets, and many more
features that we're going to be learning in this book.

Why so many files and folders?
This is a natural question when you look at the downloaded files and folders for the
first time, every file and folder is there for a purpose and now you're going to learn it:
• The build folder contains the descriptor files to create a custom version of
the Ext JS library. In here, we can find the JSB3 files that describe the files and
packages to build the library from the source code. These JSB3 files will be
used by the JavaScript Builder utility that we will learn to use later in this book.

• The builds folder contains the minified version of the library; we find the
foundation, the core, and the Ext JS sandboxed version of the library. The
sandboxed version allows us to run Ext 4 and any older version of the Ext
library on the same page.

• The docs folder contains documentation of the API. Just open the index.
html file and you're going to see the packages and classes with all the
configuration, properties, methods and events available, guides and tutorials,
links to watch videos online, and examples.

• The examples folder contains a lot of examples of the components, layouts,
and small applications that are built to show what we can do with the
library. Open the index.html file and explore the samples and demos by
yourself. It's important to say that some of them need to run on a web server,
especially those that use Ajax.

• The locale folder has the translations of 45 languages. By default the
components are displayed in English, but you can translate them to any
other language.

• The jsbuilder folder contains the tool to build and compress our source
code; the tool is written in Java and uses the YUI Compressor to improve file
minification. The minification process allows us to create packages with all
the classes and files that are needed in our application, this is an important
step before deploying our application in production.

• The src folder contains all the classes of the framework. Each class is in
its own file so we can read it easily, and every folder corresponds to the
namespace assigned to the class. For example, the class Ext.grid.Panel is
in a file called Panel.js that is in a folder called grid (src/grid/Panel.js).

• The resources folder is where the styles and images are located; also we can
find the Sass files to create our custom theme in here. Sass is an extension of
CSS3 to improve the language; we can use variables, mixins, conditionals,
expressions, and more with Sass.

• The welcome folder contains the styles and images that are shown when we
open the index.html file in the root folder.
If you look at the root folder you can also see other JavaScript files. Basically,
they are the compressed, debug, and development versions of the library.

• The ext-all.js file is the complete library with all the components, utilities,
and classes. This file is minified so we can use it for a production environment.

• The ext-all-debug.js file is the same as the ext-all.js file, but it is not
minified so we can use this file to debug our application.

• The ext-all-dev.js file is similar to the ext-all-debug.js file but
contains additional code to show more specific errors and warnings at
development time; we should use this file when developing our application.

• The ext.js file is the core and foundation layer for Ext JS. If we use this file,
we're not loading the whole library; this file contains only the class system,
the loader, and a few other classes. We can use the Ext.Loader class to load
just the required classes and not the entire framework; we should use this file
only in development environments.

• The ext-debug.js and ext-dev.js files follow the same concept as
mentioned with the ext-all files. The ext-debug.js file is an exact version
of the ext.js file but is not minified. The ext-dev.js file contains extra code
to log more specific errors in a development environment.

Introduction to Application Architecture
Ext JS provides support for both MVC and MVVM application architectures. Both of these architectural approaches share certain concepts and focus on dividing application code along logical lines. Each approach has its strengths based on how it chooses to divide up the pieces of an application.
The goal of this guide is to provide you with foundational knowledge regarding the components that make up these architectures.
What is MVC?
In an MVC architecture, most classes are either Models, Views or Controllers. The user interacts with Views, which display data held in Models. Those interactions are monitored by a Controller, which then responds to the interactions by updating the View and Model, as necessary.
The View and the Model are generally unaware of each other because the Controller has the sole responsibility of directing updates. Generally speaking, Controllers will contain most of the application logic within an MVC application. Views ideally have little (if any) business logic. Models are primarily an interface to data and contain business logic to manage changes to said data.
The goal of MVC is to clearly define the responsibilities for each class in the application. Because every class has clearly defined responsibilities, they implicitly become decoupled from the larger environment. This makes the app easier to test and maintain, and its code more reusable.
What is MVVM?
The key difference between MVC and MVVM is that MVVM features an abstraction of a View called the ViewModel. The ViewModel coordinates the changes between a Model’s data and the View’s presentation of that data using a technique called “data binding”.
The result is that the Model and framework perform as much work as possible, minimizing or eliminating application logic that directly manipulates the View.
Returning Users
Ext JS 5 introduces support for the MVVM architecture as well as improvements on the (C) in MVC. While we encourage you to investigate and take advantage of these improvements, it is important to note that we have made every effort to ensure existing Ext JS 4 MVC applications continue to function unmodified.
MVC and MVVM
To understand how these choices fit into your application, we should start by defining what the various abbreviations represent.
  • (M) Model - This is the data for your application. A set of classes (called “Models”) defines the fields for their data (e.g. a User model with user-name and password fields). Models know how to persist themselves through the data package and can be linked to other models via associations.
Models are normally used in conjunction with Stores to provide data for grids and other components. Models are also an ideal location for any data logic that you may need, such as validation, conversion, etc.
  • (V) View - A View is any type of component that is visually represented. For instance, grids, trees and panels are all considered Views.
  • (C) Controller - Controllers are used as a place to maintain the view’s logic that makes your app work. This could entail rendering views, routing, instantiating Models, and any other sort of app logic.
  • (VM) ViewModel - The ViewModel is a class that manages data specific to the View. It allows interested components to bind to it and be updated whenever this data changes.
These application architectures are provide structure and consistency to your framework code. Following the conventions we suggest will provide a number of important benefits:
  • Every application works in the same manner, so you only have to learn it once.
  • It’s easy to share code between applications.
  • You can use Sencha Cmd to create optimized production versions of your applications
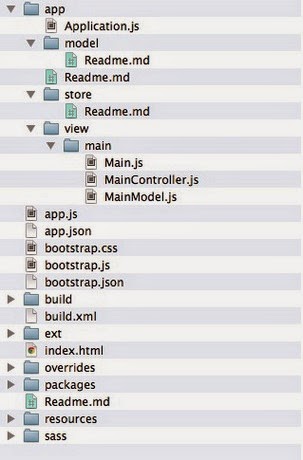
 Folder Structure


Tutorial 3 - Create Data JSON for ExtJS using php Json_encode function

ExtJS using ajax for all data activities , you can use JSON (javascript Object Node) which can easily created by using json_encode function in PHP

  1. Let's start by creating folder data in your ExtJS web project .. wamp\www\ext5-aplikasiku\app\data
  2. Then create files that will be needed for your json
  3. Update your koneksi.php to access your dbextjs database in mysql
    <?php

    $dbhost = "localhost";
    $dbname = "dbextjs";
    $dbuser = "root";
    $dbpwd     = "" ; //my MySQL password is empty

    $koneksi     = mysql_connect($dbhost,$dbuser,$dbpwd) or die("gagal koneksi");
    $mydb         = mysql_select_db($dbname);

    ?>
  4. Update your getcategory.php file
    <?php

    include 'koneksi.php';

    //A) paging start and limit handling in ExtJS
    if(isset($_GET['start'])) {
        $start = $_GET['start'];
        } else {
            $start = 0;
        }

    if(isset($_GET['limit'])) {
    $limit = $_GET['limit'];
        } else {
            $limit= 10;
        }


    //B) Request data to MySQL and put the data in array
    $sql = "select * from tbproductcat order by catid desc Limit $start,$limit";
    $query = mysql_query($sql);

    $jsonRow = array();
    while ($row_data = mysql_fetch_assoc($query)) {
        $jsonRow[] = $row_data;
    };


    //C) Request total row for paging
    $total = mysql_query('select count(*) as totalCol from tbproductcat');
    $total_data = mysql_fetch_assoc($total);


    //D) using json_encode to convert to JSON format

    echo json_encode(array
        (
        "success" => mysql_errno()==0,    //callback
        "total" => $total_data['totalCol'],        //total all data for paging
        "category" => $jsonRow // selector as root in store
        )
    );

    ?>
    Run the JSON file using your browser  (http://localhost/ext5-aplikasiku/data/getcategory.php)
    the result will look like this


    {"success":true,"total":"2","category":[{"catid":"1","catname":"ELEKTRONIK","catstatus":"1"},{"catid":"2","catname":"OTOMOTIF","catstatus":"1"}]}
  5.  Update your getproduct.php script
    <?php

    include 'koneksi.php';

    //A) paging start and limit handling in ExtJS
    if(isset($_GET['start'])) {
        $start = $_GET['start'];
        } else {
            $start = 0;
        }

    if(isset($_GET['limit'])) {
    $limit = $_GET['limit'];
        } else {
            $limit= 10;
        }


    //B) Request data to MySQL and put the data in array
    $sql = "select * from tbproductsales order by prdid desc Limit $start,$limit";
    $query = mysql_query($sql);

    $jsonRow = array();
    while ($row_data = mysql_fetch_assoc($query)) {
        $jsonRow[] = $row_data;
    };


    //C) Request total row for paging
    $total = mysql_query('select count(*) as totalCol from tbproductsales');
    $total_data = mysql_fetch_assoc($total);


    //D) using json_encode to convert to JSON format

    echo json_encode(array
        (
        "success" => mysql_errno()==0,    //callback
        "total" => $total_data['totalCol'],        //total all data for paging
        "product" => $jsonRow // selector as root in store
        )
    );

    ?>
  6.  Update your getuser.php script
    <?php

    include 'koneksi.php';

    //A) paging start and limit handling in ExtJS
    if(isset($_GET['start'])) {
        $start = $_GET['start'];
        } else {
            $start = 0;
        }

    if(isset($_GET['limit'])) {
    $limit = $_GET['limit'];
        } else {
            $limit= 10;
        }


    //B) Request data to MySQL and put the data in array
    $sql = "select * from tbusers order by userid desc Limit $start,$limit";
    $query = mysql_query($sql);

    $jsonRow = array();
    while ($row_data = mysql_fetch_assoc($query)) {
        $jsonRow[] = $row_data;
    };


    //C) Request total row for paging
    $total = mysql_query('select count(*) as totalCol from tbusers');
    $total_data = mysql_fetch_assoc($total);


    //D) using json_encode to convert to JSON format

    echo json_encode(array
        (
        "success" => mysql_errno()==0,    //callback
        "total" => $total_data['totalCol'],        //total all data for paging
        "appuser" => $jsonRow // selector as root in store
        )
    );

    ?>


Copyright
Hery Purnama
http://freelance-it-trainer.blogspot.com

Tutorial 2 - Create MySQL Database for Extjs 5 web application example

I will use PHP and MySql database for all of my main ExtJS tutorial , i will create database named "dbextjs" and three tables in it ( tbproductsales , tbproductcat , tbuser )

Here's the SQL script that you can execute with your phpmyadmin

-- phpMyAdmin SQL Dump
-- version 2.11.5
-- http://www.phpmyadmin.net
--
-- Host: localhost
-- Generation Time: Apr 07, 2015 at 11:00 PM
-- Server version: 5.0.51
-- PHP Version: 5.2.5

SET SQL_MODE="NO_AUTO_VALUE_ON_ZERO";

--
-- Database: `dbextjs`
--

-- --------------------------------------------------------

--
-- Table structure for table `tbproductcat`
--

DROP TABLE IF EXISTS `tbproductcat`;
CREATE TABLE IF NOT EXISTS `tbproductcat` (
  `catid` int(10) unsigned NOT NULL auto_increment,
  `catname` varchar(50) NOT NULL,
  `catstatus` int(11) NOT NULL default '1',
  PRIMARY KEY  (`catid`),
  KEY `catname` (`catname`)
) ENGINE=InnoDB  DEFAULT CHARSET=latin1 AUTO_INCREMENT=3 ;

--
-- Dumping data for table `tbproductcat`
--

INSERT INTO `tbproductcat` (`catid`, `catname`, `catstatus`) VALUES
(1, 'ELEKTRONIK', 1),
(2, 'OTOMOTIF', 1);

-- --------------------------------------------------------

--
-- Table structure for table `tbproductsales`
--

DROP TABLE IF EXISTS `tbproductsales`;
CREATE TABLE IF NOT EXISTS `tbproductsales` (
  `prdid` int(10) unsigned NOT NULL auto_increment,
  `prdname` varchar(50) NOT NULL,
  `prdcat` int(11) NOT NULL,
  `prdprice` double NOT NULL,
  `prdqty` int(11) NOT NULL,
  `salesdate` timestamp NOT NULL default CURRENT_TIMESTAMP,
  PRIMARY KEY  (`prdid`),
  KEY `prdname` (`prdname`,`prdcat`)
) ENGINE=InnoDB  DEFAULT CHARSET=latin1 AUTO_INCREMENT=7 ;

--
-- Dumping data for table `tbproductsales`
--

INSERT INTO `tbproductsales` (`prdid`, `prdname`, `prdcat`, `prdprice`, `prdqty`, `salesdate`) VALUES
(1, 'TOYOTA KIJANG', 2, 120000000, 5, '2015-04-07 21:54:21'),
(2, 'NISAN GRAND LIVINA XV', 2, 185000000, 14, '2015-04-07 21:54:21'),
(3, 'HONDA SUPRAFIT', 2, 12000000, 33, '2015-04-01 21:54:52'),
(4, 'MESIN CUCI MIYAKO', 1, 2350000, 65, '2015-04-07 21:55:29'),
(5, 'TV FLAT LG 50 INCH', 1, 12300000, 14, '2015-02-12 21:56:46'),
(6, 'KULKAS SANYO 3 PINTU', 1, 4300000, 21, '2015-03-19 21:56:38');

-- --------------------------------------------------------

--
-- Table structure for table `tbusers`
--

DROP TABLE IF EXISTS `tbusers`;
CREATE TABLE IF NOT EXISTS `tbusers` (
  `userid` int(10) unsigned NOT NULL auto_increment,
  `username` varchar(50) NOT NULL,
  `userpwd` varchar(10) NOT NULL,
  `userlevel` varchar(50) NOT NULL default 'User',
  PRIMARY KEY  (`userid`)
) ENGINE=InnoDB  DEFAULT CHARSET=latin1 AUTO_INCREMENT=3 ;

--
-- Dumping data for table `tbusers`
--

INSERT INTO `tbusers` (`userid`, `username`, `userpwd`, `userlevel`) VALUES
(1, 'admin', 'admin123', 'Admin'),
(2, 'hery', 'hery123', 'User');

Thanks

Hery Purnama
Freelance IT Trainer
http://freelance-it-trainer.blogspot.com
081.223344.506


Tutorial 1 - Sencha Cmd - Build your first ExtJS 5 web application

Sencha ExtJS 5 is very powerfull javascript framework , you can start to build your first application by using scafolding feature.  what you need to do is download sencha cmd 5 for windows.
In this case i am using Wamp Server , so the folder should be generated in wamp\www after i run the command
1. Download sencha extjs 5.0.1 gpl
2. Extract the zip file in any location for example i will extract it in D:\
3. Install the Sencha Cmd 5 , by default it will be installed in C:\users\administrator\bin\sencha
4. Go to start --> Cmd (to open your windows command prompt)
5. use this command bellowed


C:\Users\Administrator>sencha -sdk d:\ext-5 generate app Aplikasiku d:\wamp\www\ext5-aplikasiku

aplikasiku is your scaffolding application name , ext5-applikasiku is your web application folder

the process will look like this ...

Sencha Cmd v5.1.2.52
[INF] Processing Build Descriptor : default
[INF] Loading app json manifest...
[INF] Appending content to d:\wamp\www\
ext5-aplikasiku/bootstrap.js
[INF] Writing content to d:\wamp\www\
ext5-aplikasiku/bootstrap.json

That's it, your startup application is ready to access by using your localhost path address
http://localhost/ext5-aplikasiku
Thanks
Regards,

Hery Purnama
Freelance IT Trainer
http://freelance-it-trainer.blogspot.com
081.223344.506

Indonesia Sencha ExtJS Freelance Trainer

Hery Purnama 081.223344.506 (Bandung) - Freelance Certified IT Trainer  for Sencha ExtJS and Sencha Touch, Excel VBA Macro , Android Phonegap, Google Map API, Google Sketchup3D , MS Project,  Oracle DBA, SQL Server DBA, MySQL DBA, MS. Access VBA, Primavera, MS Project, SMS gateway, Ubuntu Server and other IT topics

My Blog is http://freelance-it-trainer.blogspot.com